A careful RAM installation begins before the case is opened
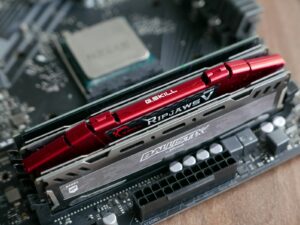
Installing desktop memory is physically straightforward, but compatibility, slot placement, power isolation, module orientation, and post-installation testing all matter. The safest process is to verify the exact motherboard requirements first, install the modules at default settings, and confirm stable operation before enabling a performance profile.
What this installation can and cannot improve
Adding RAM can improve a desktop that regularly approaches its memory limit, closes applications unexpectedly, relies heavily on virtual memory, or lacks enough capacity for games, creative software, development tools, and multitasking.
It will not automatically solve a slow processor, weak graphics card, failing storage drive, overheating system, software problem, or unstable overclock. A larger memory capacity is most useful when insufficient RAM is part of the existing bottleneck.
The installation itself does not require changing memory timings or voltage. Begin with the motherboard’s default settings and establish a stable baseline before adjusting performance profiles.
Confirm compatibility before removing the side panel
Identify the exact board and revision
Find the model printed on the motherboard, shown in BIOS, or reported by a hardware-information utility. Download the matching manual from the motherboard manufacturer rather than relying on a general guide for the entire product family.
Match DDR3, DDR4, or DDR5 exactly
Different DDR generations are not interchangeable. Their electrical requirements and notch positions differ, so a DDR5 module must not be forced into a DDR4 motherboard or the reverse.
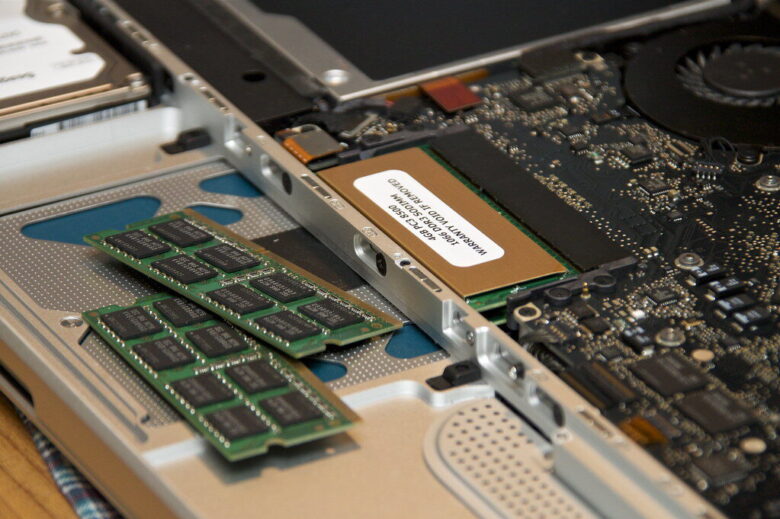
Use desktop DIMMs rather than laptop SO-DIMMs
Standard desktop motherboards normally use full-size DIMMs. Compact computers, embedded boards, and unusual systems may use SO-DIMMs or another format, so verify the physical connector.
Check both the total limit and per-module support
Confirm the maximum capacity supported by the motherboard, processor, BIOS, operating system, and each memory slot. Older firmware may not recognize newer high-density modules.
Verify ECC, non-ECC, registered, and unbuffered requirements
Most consumer desktops use non-ECC unbuffered memory. Server and workstation modules may be physically similar but electrically incompatible with a consumer motherboard.
Compare the complete kit code with support information
A motherboard qualified vendor list can show configurations tested by the board manufacturer. A kit that is not listed may still work, but an exact match provides stronger compatibility evidence.
| Specification | What must match | Common mistake | Best place to verify |
|---|---|---|---|
| DDR generation | The memory generation supported by the motherboard | Buying DDR5 for a DDR4 board because the speed appears better | Motherboard manual and specifications |
| Form factor | Desktop DIMM or the specific format required by the system | Ordering a laptop SO-DIMM for a standard desktop motherboard | Motherboard slot diagram |
| Total capacity | Maximum supported memory across all installed slots | Assuming that every four-slot motherboard supports any four-module capacity | Specifications and CPU memory support |
| Module capacity | Supported capacity and density for each slot | Installing a high-density module that requires newer BIOS support | QVL, BIOS notes, and memory manufacturer configurator |
| ECC and buffering | Non-ECC, ECC, unbuffered, or registered as required | Buying inexpensive server memory for a consumer desktop | Motherboard and processor documentation |
| Advertised speed | A data rate the platform can operate reliably | Assuming the highest XMP or EXPO number is guaranteed | CPU specification, motherboard QVL, and memory data sheet |
| Module height | Clearance beneath the CPU cooler and inside the case | Buying tall RGB memory that conflicts with a large air cooler | Memory and cooler dimensions |
Choose the correct memory slots
A motherboard with four DIMM sockets normally divides them between two processor memory channels. The slots may be labeled A1, A2, B1, and B2, but the recommended population order depends on the motherboard design.
A2 and B2 are common preferred locations for two modules, but the manual for the exact motherboard is the final authority.
Use the first slot specified in the motherboard manual. On many four-slot boards this is A2, but other layouts exist.
Use the recommended paired slots so both processor memory channels can operate. A2 and B2 are common on modern desktop boards.
Populate all four slots only when the board, CPU, kit, and intended speed support that configuration. Four modules can be harder to run at aggressive overclocked settings.
Install the modules in both available sockets when using a matched pair. Check the manual if only one module will be installed.
Prepare a safe and organized workspace
Do not begin while the computer is sleeping or hibernating. Save open work and perform a full shutdown.
Turn the power-supply switch to the off position when one is present, unplug the mains cable, and disconnect accessories that prevent safe case access.
With the computer unplugged, press the case power button once. This does not replace proper electrical safety, but it can help discharge remaining stored energy in parts of the system.
Avoid carpet, bedding, and unstable furniture. Place a removed glass panel flat in a protected location where its edges cannot be struck.
Use a properly grounded antistatic wrist strap or touch an unpainted grounded metal surface before handling internal components. Hold RAM by the edges rather than its contacts or chips.
Move loose cables carefully. A large graphics card or CPU cooler may restrict access, but do not remove other components unless the case design genuinely requires it.
Installing the desktop RAM modules
Avoid touching the gold contacts, memory chips, and small components on the circuit board.
A compatible module fits in only one orientation. If the notch does not align, stop and recheck the memory generation and direction.
Keep the module vertical and apply firm, balanced pressure near both top corners until the retaining latch or latches engage.
Release the retaining latch or latches
Some motherboards have moving latches at both ends of the slot. Others use one moving latch and one fixed end. Open only the parts designed to move.
Compare the slot label with the motherboard manual
Before inserting the first module, confirm that you are using the recommended socket for a one-, two-, or four-module configuration.
Place the DIMM directly above the socket
Match the offset notch on the module with the key inside the slot. Both ends of the module should line up with the socket guides.
Push vertically and evenly
Use both hands and press firmly near the upper corners. Avoid rocking the module from side to side or pushing on only one end.
Confirm that the module is fully locked
- The moving latch or latches should engage the module’s side notches.
- The module should sit level rather than leaning to one side.
- Both ends should be inserted to the same depth.
- A large strip of gold contact should not remain visible.
Repeat the process for the second module
Install the other module in the paired slot shown in the manual. Check both modules again after the second one is seated.
Check for disturbed cables or components
Make sure no fan cable, storage cable, graphics-card power connector, or front-panel connection was loosened while accessing the memory sockets.
Replace the side panel before normal use
Once the installation has been inspected, close the case, reconnect the monitor and essential peripherals, connect power, and switch the power supply back on.
What to expect during the first startup
The first boot may take longer
Some motherboards need additional time to initialize or train a new memory configuration, particularly with DDR5 or a changed module count.
The computer may restart
A board may perform one or more automatic restart cycles while testing memory settings. Observe its status lights and follow the manual before interrupting the process.
Reaching Windows is not a full test
A marginal module or unstable profile can start successfully and fail later during gaming, rendering, compression, installation, or sleep and resume.
Verify the installation in BIOS and the operating system
The BIOS should show the expected total capacity and, when available, the populated slots.
Use the setup key shown during startup, commonly Delete or F2. Locate the memory, DRAM, system-information, or EZ Mode summary.
Compare the reported memory with the combined capacity of the installed modules. A small hardware-reserved amount inside the operating system does not necessarily indicate a failed installation.
When the BIOS provides a slot map, check that each installed module appears in the intended location.
Open Task Manager, select Performance, and then Memory. Review the installed capacity and reported operating speed.
CPU-Z can report memory type, active frequency, timings, and SPD information stored on compatible modules.
Test the memory before relying on the computer
Confirm that every installed module and the complete expected capacity are recognized before changing performance settings.
Use a reputable tool such as MemTest86. Repeatable errors should be investigated rather than treated as acceptable.
Run a trusted memory test within the operating system and observe crashes, freezes, hardware-error reports, and unexpected restarts.
Use the games, editing projects, compilers, virtual machines, archives, and other demanding programs that matter on the desktop.
Test cold boots, normal restarts, sleep and resume, and several hours of ordinary use. Some problems appear only during memory initialization.
After the default configuration is stable, enable the ordinary XMP or EXPO profile when supported, then repeat the full verification process.
Troubleshooting when the computer does not start correctly
Allow reasonable memory-initialization time, then shut down and unplug the computer. Reseat the modules and confirm that the latches are fully engaged.
Check the motherboard manual for the meaning of its diagnostic lights. Test one module at a time in the recommended single-module slot.
Power down and reseat both modules. Then test each module individually in the recommended slot to separate a module problem from a slot or compatibility problem.
Verify the module sizes, slot arrangement, BIOS support, motherboard capacity limit, CPU memory support, and whether the operating system is reserving part of the memory for hardware.
The overclocked profile may be unstable for the exact processor, motherboard, BIOS, module count, or capacity. Return to defaults or use a lower supported data rate.
Modules sold separately are not guaranteed to behave as one factory-matched kit, even when their visible brand, speed, and timings appear identical.
Recheck the complete part number, DDR generation, capacity, module density, ECC type, QVL information, and relevant BIOS release notes.
Return the system to the original known-good setup and inspect any cables or components disturbed during the work. Use qualified support when physical board, socket, or CPU inspection is required.
Installation mistakes that create avoidable problems
Installing memory while power remains connected
A desktop that appears off can still contain energized standby circuits. Disconnect the mains cable before touching the DIMM sockets.
Using the wrong paired slots
Two working modules can still be installed in a non-preferred arrangement. Follow the exact slot map in the motherboard manual.
Forcing the notch in the wrong direction
The offset key prevents incorrect insertion. Resistance caused by misalignment is a reason to stop, not to press harder.
Pressing on only one end
One side may appear locked while the other remains partially inserted. Apply balanced pressure near both top corners.
Assuming both latches must move
Many current boards have one moving latch and one fixed end. Forcing a fixed part can damage the socket.
Touching the gold contacts
Oils and contamination can interfere with contact. Hold modules by their edges and upper corners.
Mixing separate memory packages casually
Internal chips and module revisions can differ despite matching product names. One matched kit is the cleaner configuration.
Enabling every performance option immediately
Establish a stable default baseline before enabling XMP, EXPO, CPU overclocking, automatic tuning, or manual timings.
Set realistic expectations for the upgrade
The system may switch between applications more smoothly, keep more browser tabs open, reduce heavy paging, and handle larger projects.
Adding more unused RAM may produce little visible change. Performance could remain limited by the CPU, GPU, storage, software, or cooling.
Bandwidth-sensitive workloads and integrated graphics may benefit, but the size of the improvement depends on the system and application.
Frequently asked questions
Which RAM slots should I use for two modules?
Use the paired sockets specified by the motherboard manual. A2 and B2 are common preferred locations on modern four-slot boards, but this is not a universal rule.
How much pressure should be required?
Desktop DIMMs often require firm pressure, but the notch must be aligned first. Press vertically and evenly near both upper corners. Stop when the module is misaligned or the socket key does not match.
Do the latches always close automatically?
Moving latches normally engage as the module becomes fully seated. Some motherboards use a fixed end on one side, so inspect the socket design before installation.
Why is my new RAM running slower than advertised?
The motherboard may be using a standard default memory profile. Advertised XMP or EXPO speeds are overclocked settings that must be enabled separately and are not guaranteed on every system.
Should I enable XMP or EXPO immediately?
First confirm that the full capacity is detected and stable at default settings. Then enable the ordinary supported profile and repeat memory diagnostics and real-world testing.
Can I combine new RAM with my existing modules?
It may work, but separately purchased modules are not guaranteed to operate together reliably. The system may use lower shared settings. One matched kit is normally easier to validate.
Why does the first DDR5 boot take so long?
The motherboard may be initializing and training the new memory configuration. Consult the board’s status indicators and manual before interrupting the startup process.
Do I need to reinstall Windows after adding RAM?
No. A normal compatible RAM installation does not require a Windows reinstallation. Confirm the capacity, test stability, and investigate any new errors before returning to important work.
Can bad RAM corrupt files?
Unstable or defective memory can contribute to application crashes, failed installations, damaged archives, calculation errors, and corrupted work. Do not ignore repeatable memory-test errors.
Should I update BIOS when the memory is not detected?
First reseat the modules, verify compatibility, test one module at a time, and restore the original configuration. Consider a BIOS update only when the official release notes address relevant memory, processor, or module-density support.
Final installation checklist
Confirm the exact motherboard and compatible memory before opening the case. Shut the computer down, disconnect power, control static electricity, and use the slot arrangement shown in the board manual.
Align the module notch before applying pressure. Keep each DIMM vertical, press firmly and evenly near both ends, and confirm that the retaining latch or latches are fully engaged.
On the first boot, verify the full capacity in BIOS, test the memory at default settings, and only then enable a supported XMP or EXPO profile. Reliable operation is more important than reaching the highest number printed on the memory package.
Official installation and verification references
- Kingston desktop DIMM installation guide
- ASUS motherboard DRAM installation and BIOS verification guide
- MSI motherboard memory selection and installation guide
- Crucial desktop memory upgrade guide
- Crucial memory installation troubleshooting
- CPU-Z memory, timing, motherboard, and SPD information
- MemTest86 bootable memory diagnostic
- Intel Extreme Memory Profile information
- AMD EXPO memory-overclocking information

Ivi RAM Boost Editorial Team prepares practical RAM upgrade, compatibility, performance, and troubleshooting guides using manufacturer specifications, operating-system documentation, platform documentation, and clearly identified secondary references. We do not claim physical testing or hands-on benchmarking unless an article explicitly documents that testing.